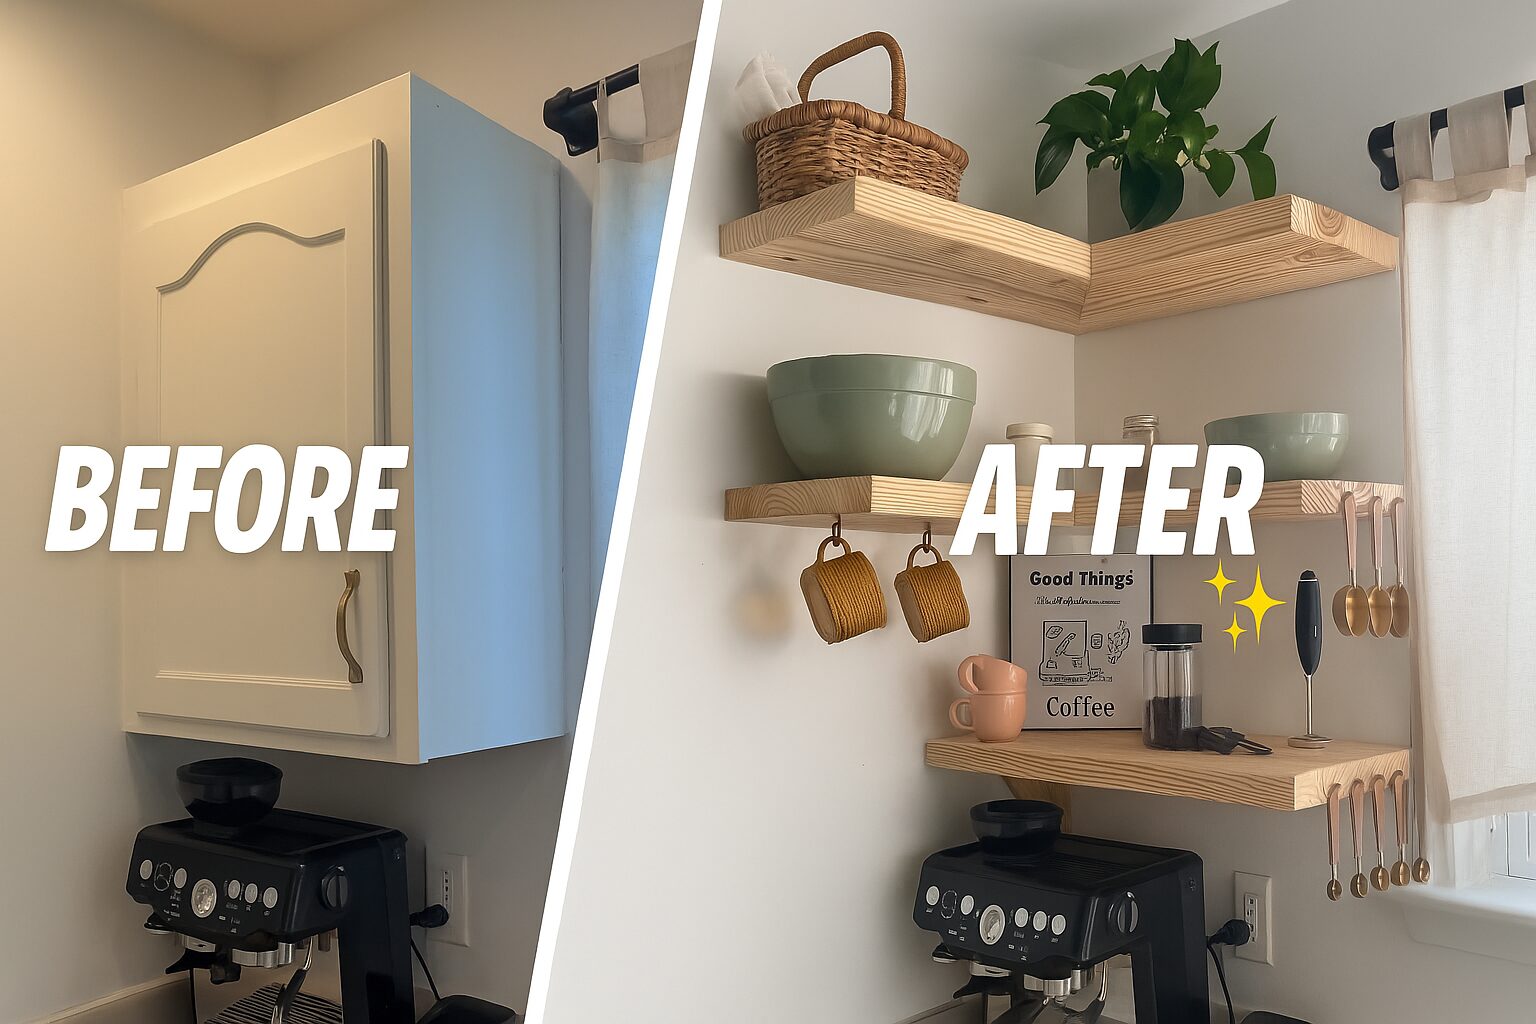
Looking for a quick, budget-friendly way to upgrade your kitchen wall? This DIY project transforms a plain, outdated wall into a stylish and functional space with just a few tools, hooks, paint, and floating wood shelves. Ideal for renters or homeowners who want a weekend refresh.
What You’ll Need
Materials:
- Matte wall paint (your color of choice)
- Wall filler or spackle
- Sandpaper
- Floating wood shelves
- Screws & drywall anchors
- Black-finish metal hooks
- Small wooden board
- Wood stain or paint
- Minimalist decor: mugs, plants, framed art, jars
Tools:
- Drill or screwdriver
- Paint roller and brush
- Measuring tape
- Level
- Putty knife
- Pencil
- Wood saw
Video
Step-by-Step Instructions:
Step 1: Remove Old Fixtures
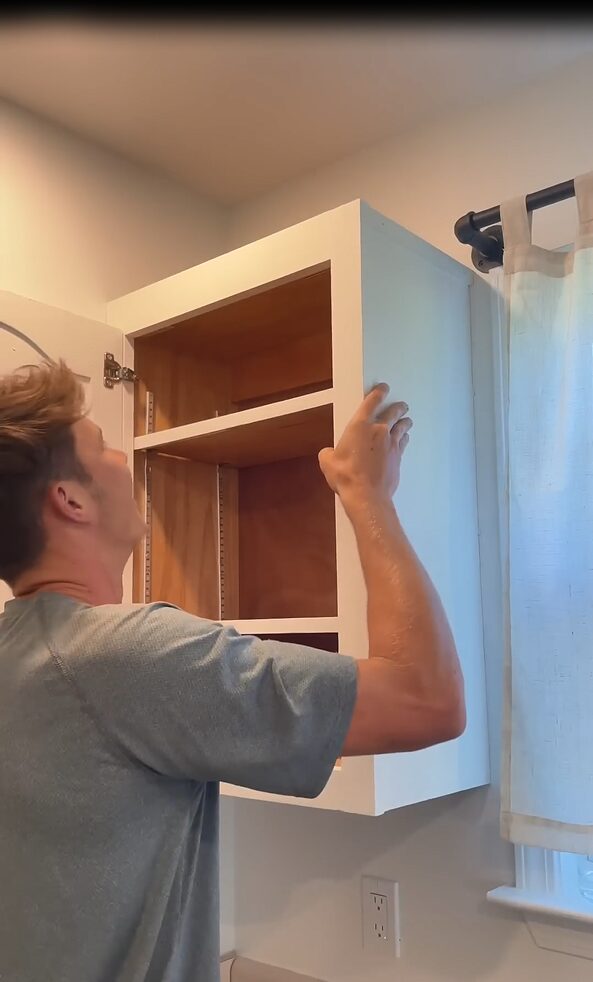
Start by unscrewing any old shelves, hooks, or items attached to the wall. Patch large holes using filler. Let it dry completely.
Step 2: Clean the Wall

Wipe down the wall to remove grease, dust, and leftover residue. A clean surface is essential before painting.
Step 3: Apply Fresh Paint
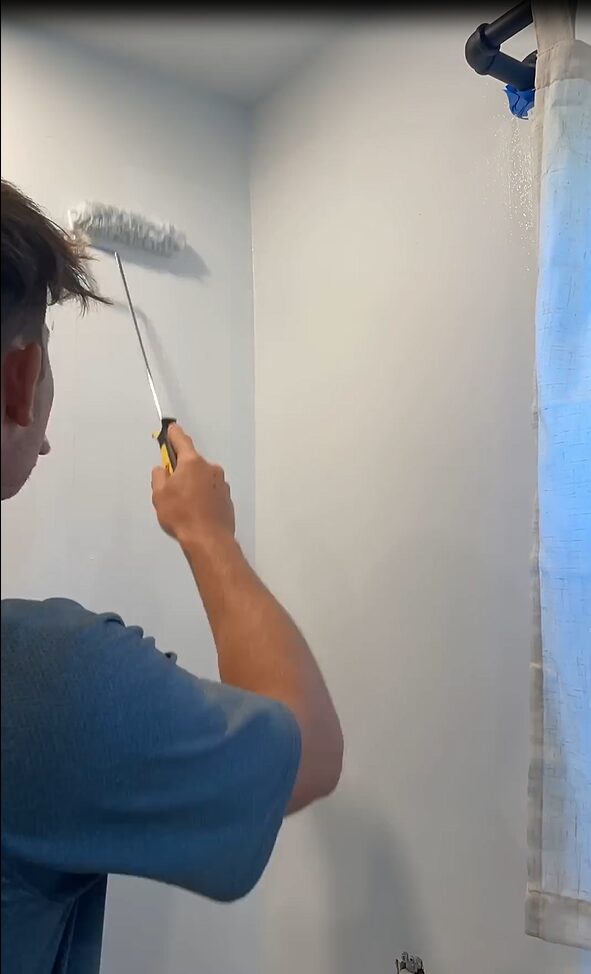
Use a roller and brush to repaint the wall with your chosen color. Matte finishes give a soft modern touch. Let it dry 1–2 hours.
Step 4: Measure & Cut Shelves
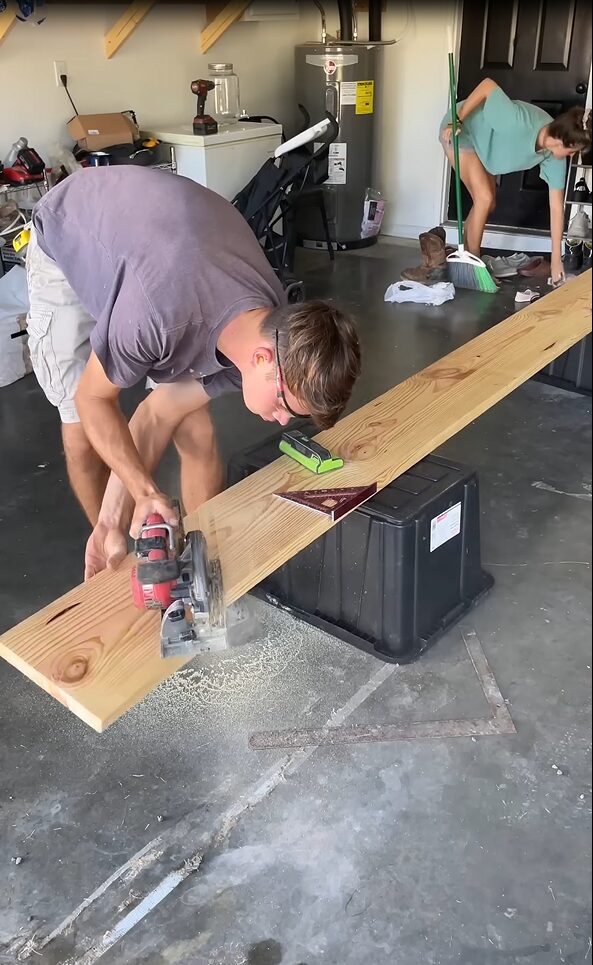
Use a tape measure to size your wood shelves to fit the wall space. Cut them with a saw, then stain or paint them. Let dry.
Step 5: Install Floating Shelves
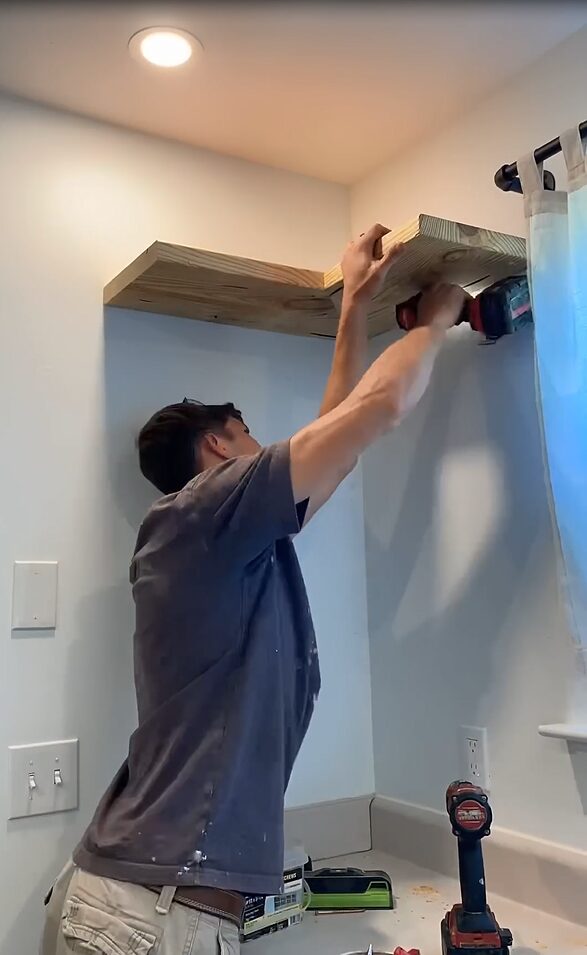
Mark lines with a level. Drill in supports and screw the shelves into the wall securely.
Step 6: Mount Hook Board
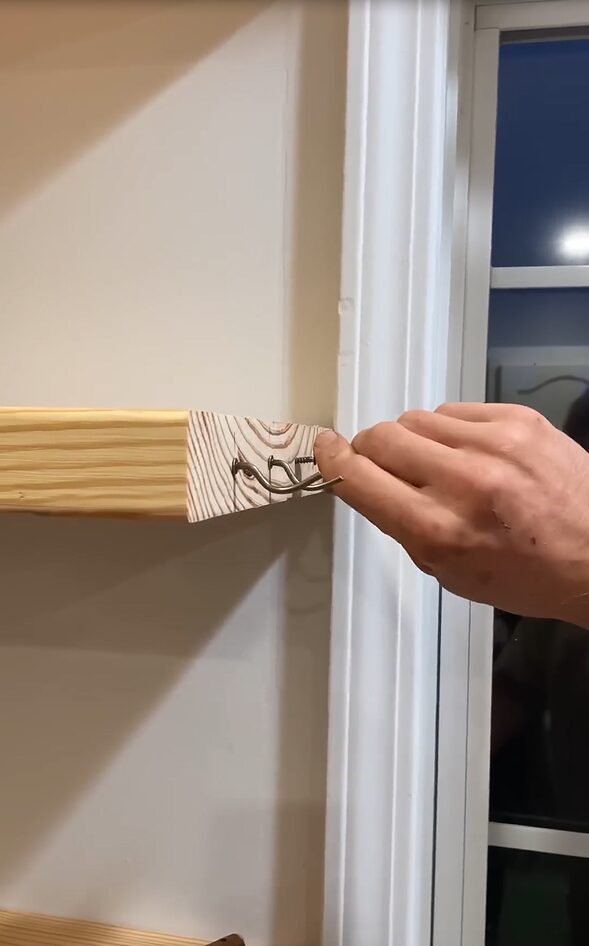
Cut a small wooden board, finish it with paint or stain, attach 3–4 metal hooks, and screw it into the wall at eye level.
Step 7: Add Decor
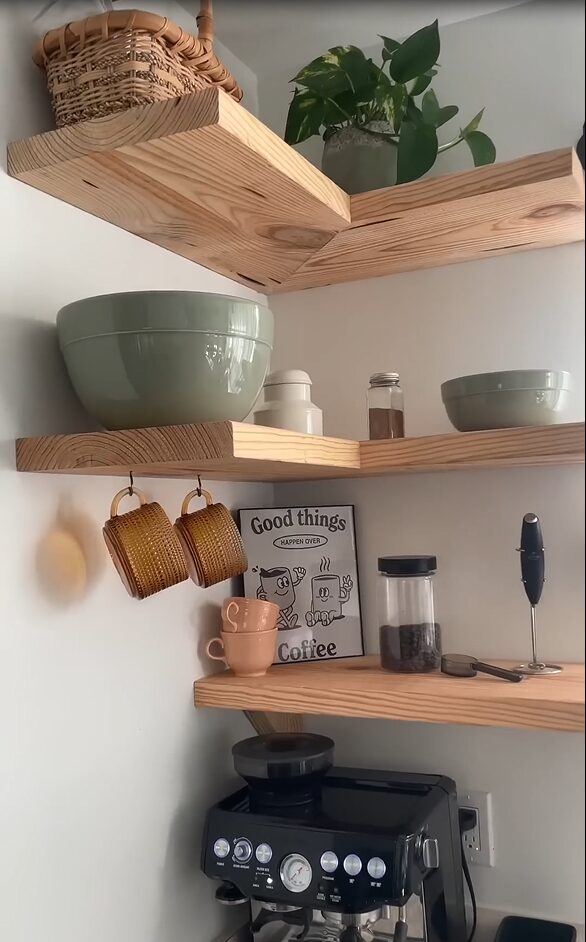
Hang mugs or utensils on the hooks. Add small plants, spice jars, or frames on the shelf for a cozy, personal touch.
Final Result
A beautiful, practical kitchen wall with floating shelves and hooks for daily use. The space feels fresh, warm, and intentional—perfect for any DIY home lover.
Pro Tips
- Use a stud finder for extra support with heavier shelves.
- Add peel-and-stick wallpaper behind the shelves for extra contrast.
- Keep all hardware in matching colors for a unified look.
- Use painter’s tape for sharp paint edges.
References: Sabrina Klass
Leave a Reply