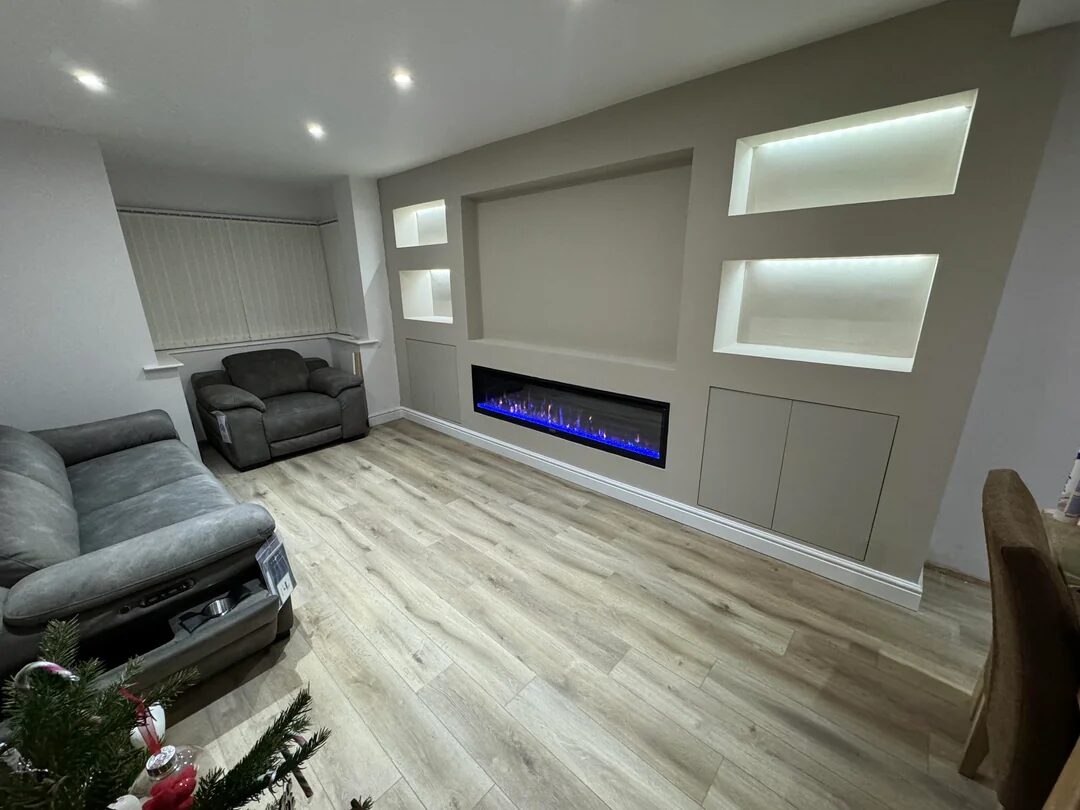
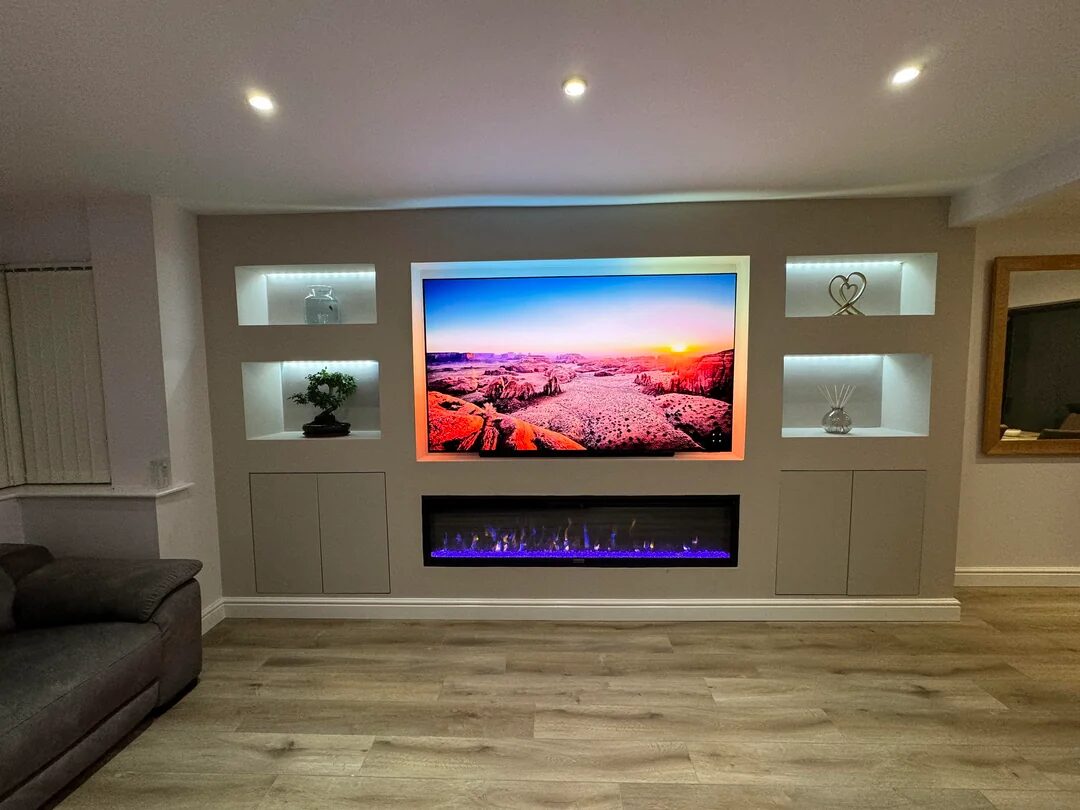
I came across this living-room makeover and couldn’t keep it to myself. The homeowner built a custom media wall—complete with a large TV niche, an electric fireplace, and back-lit display cubbies—and the whole room now feels intentional, cozy, and high-end. Below is my write-up of what makes the project work and how you can replicate the look at home.
Why this design works
-
Clean symmetry. A centered TV and fireplace are flanked by balanced display niches, so the wall reads calm and orderly.
-
Layered lighting. Recessed ceiling lights, soft LED strips inside the niches, and a subtle glow around the TV add depth at night.
-
Concealed clutter. Wires and components disappear behind the wall and inside base cabinets—nothing distracts from the view.
-
Cohesive finishes. A warm gray paint pairs with the floor tone, while the blue flame line brings a modern, luxe vibe.
Materials & tools (typical for this build)
Framing & sheathing: 2×3 or 2×4 studs, construction screws, OSB backer for the TV mount, drywall/MDF panels, joint compound, primer, and paint.
Electrical & low-voltage: recessed outlets, in-wall conduit (for HDMI, Ethernet, speaker wire), dimmer for LEDs, and a dedicated circuit if your electric fireplace requires it.
Lighting: 24V LED strips, aluminum channels with diffusers, and a suitable power supply.
Cabinetry & trim: push-to-open hinges or touch latches, simple slab doors, baseboard return pieces.
Tools: miter saw or circular saw, drill/driver, level/laser, stud finder, sander, and paint gear.
Step-by-step overview
Plan & measure
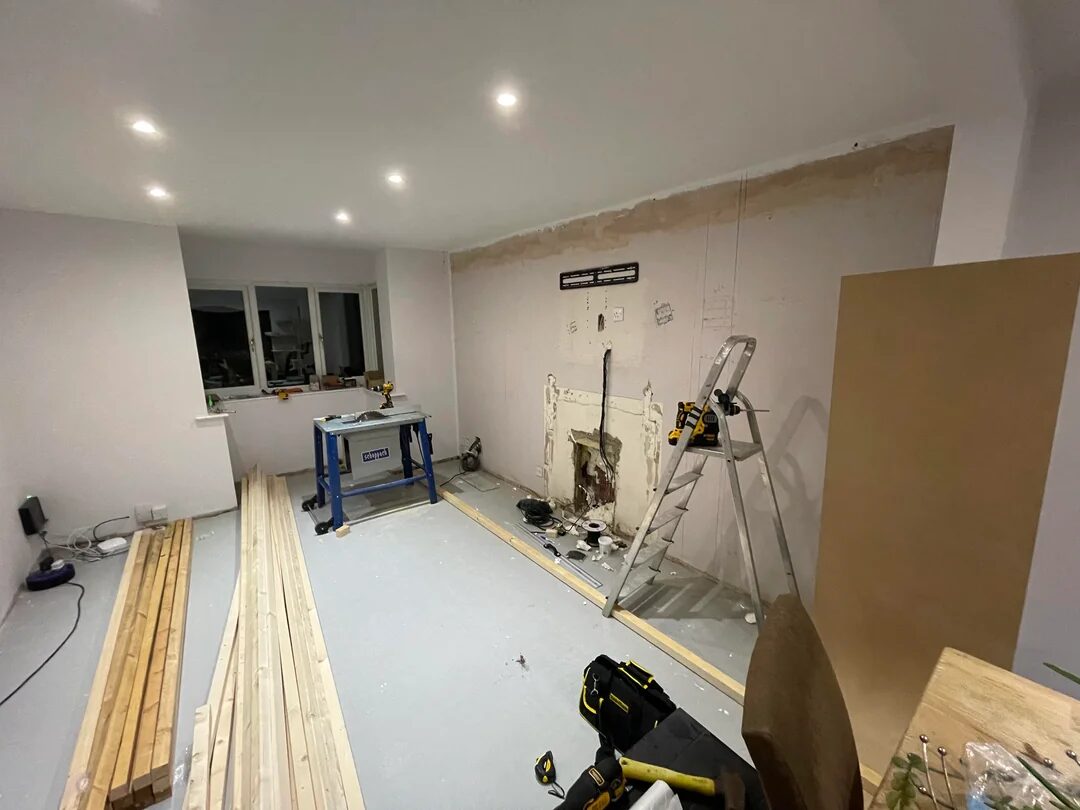
Sketch the layout to scale. Mark the TV centerline on the wall and aim to place the TV center about 40–42 inches off the floor when seated (adjust for your sofa height). Rough in the fireplace opening and the display niches.
Frame the wall
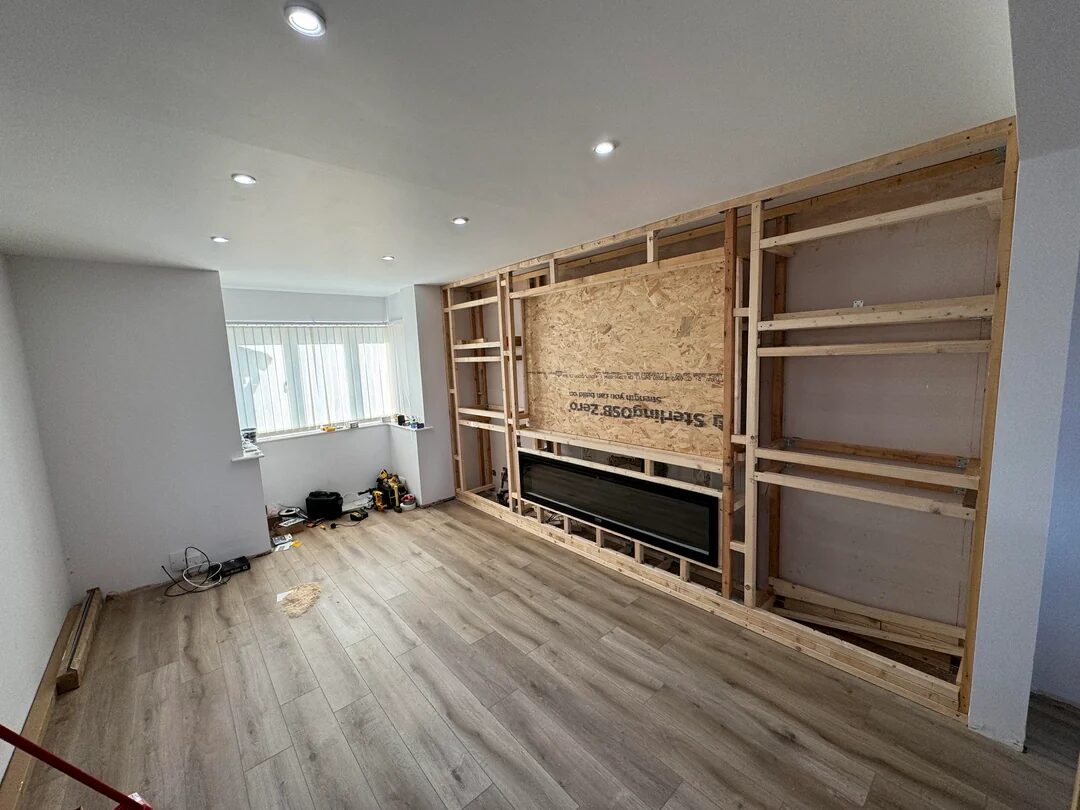
Build a stud frame anchored to the floor, ceiling, and existing wall. Add cross-bracing where the TV mount and fireplace will sit. Face the TV opening with OSB or plywood for strength.
Run power and cables
Install a recessed outlet behind the TV and another for the fireplace. Pull HDMI and data through conduit so you can upgrade later without opening the wall. Keep low-voltage separate from high-voltage.
Sheath, tape, and finish
Skin the frame with drywall or MDF. Tape the seams, apply joint compound, sand smooth, prime, and paint. A satin/eggshell sheen keeps the surface clean but avoids harsh glare around the screen.
Build the display niches
Frame and line the cubbies. Install LED channels along the top or sides so the light washes the back wall, not the viewer’s eyes. Hide drivers inside the lower cabinets with ventilation slots.
Install doors & storage
Add slab doors to the base cabinets for hidden storage. Push-to-open hardware keeps the look minimal—no handles needed.
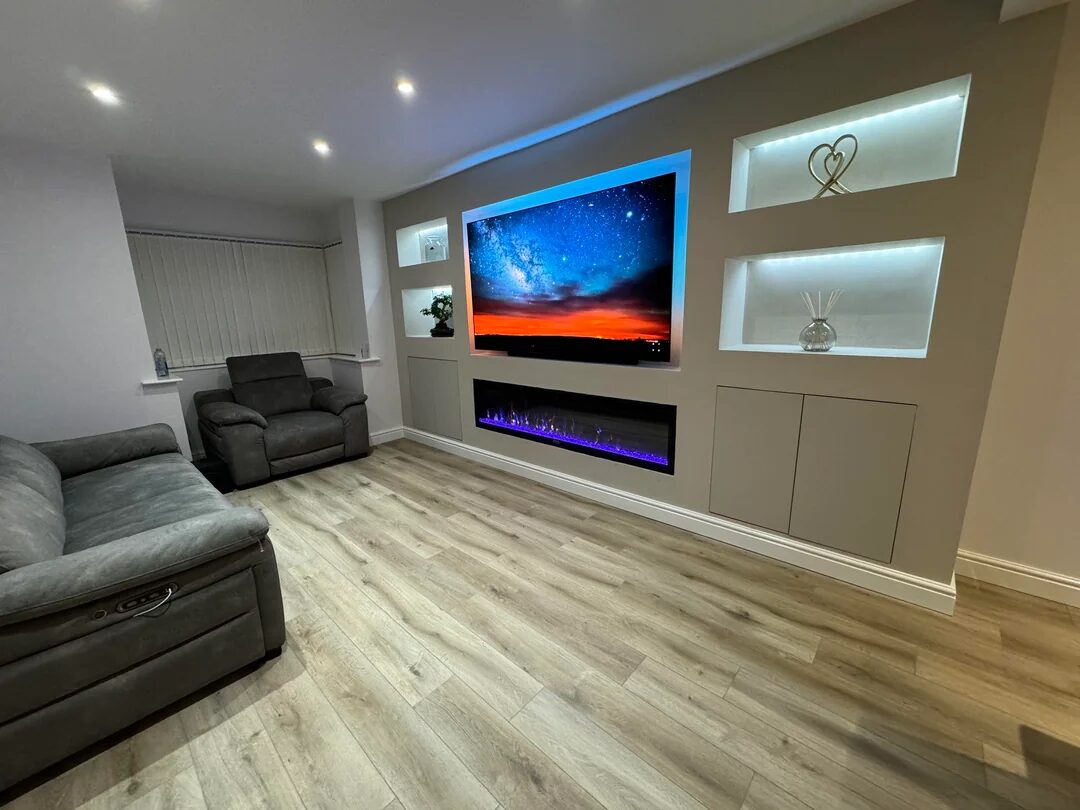
Mount the TV & set the fireplace
Hang the TV on a tilting mount so you can fine-tune the reveal (even gaps around the screen make it look custom). Slide in the electric fireplace per the manufacturer’s clearance specs. Dial in your LED color temperature (3000–3500K feels warm and welcoming; 4000K leans modern).
Timeline & budget (typical DIY range)
-
Time: 2–4 weekends for one person (faster with a helper).
-
Cost: $600–$1,900 for framing, sheathing, paint, LEDs, hardware, and an entry-to-mid electric fireplace (TV not included). Actual numbers vary by region and finish choices.
Pro tips for a “built-in” look
-
Keep a consistent reveal (⅜–¾ in.) around the TV and inside each niche.
-
Ventilate the cabinet with small, hidden slots above and below any electronics.
-
Leave pull strings or spare conduit for future cable runs.
-
Match light temperature across the room so recessed cans, LED strips, and fireplace glow feel unified.
-
Style the niches sparingly—one object per shelf looks gallery-clean.
Closing thoughts
This project is a perfect example of how a single wall can redefine an entire space. With smart framing, concealed wiring, and layered lighting, a plain room becomes a polished living area where movie nights, quiet mornings, and everything in between just feel better. If you’ve been on the fence about a media wall, let this be your sign to plan it out and go for it.
Leave a Reply